")
")
")
 Strictly speaking, there was no direct reason for this step. However, it served as a welcome distraction to escape the political turmoil surrounding the inauguration of the new US President.
My primary goal was to outsource my books and improve readability through a WordPress PDF script. Additionally, it is interesting for me to explore the various advantages and disadvantages that different Content Management Systems (CMS) offer.
Comparing Joomla and WordPress
To give a quick overview: both Joomla and WordPress have pros and cons that must be weighed when searching for the right CMS. WordPress clearly has the edge in terms of design flexibility. Integrating media files is also easier out of the box. Furthermore, the selection of themes and plugins is far larger than in Joomla. On the other hand, Joomla excels in access control (ACL) and the simple creation and integration of new pages. This makes operating larger sites with multiple authors—even those without prior technical knowledge—much simpler. For a small site that doesn't change constantly, or if you want to run a simple blog, WordPress is likely the better choice. Both systems are well worth a look.
Installation Guide
During installation, I encountered a major hurdle that forced me to reinstall WordPress several times. As it turns out, the error is quite easy and quick to fix once you know how.
If you are planning to install WordPress and, like me, use Proxmox with NGINX as a reverse proxy, you can use the following installation routines (Ubuntu 24.04).
1. Update Package Archives and the System
Before installing WordPress on a fresh system, it is essential to update your Ubuntu system to ensure you have the latest packages and security patches on the server. Open a terminal and run the following commands:
sudo apt update
sudo apt upgrade
2. Installing the LAMP Stack
WordPress requires a web server, a database, and PHP to function. We will use the LAMP stack, which stands for Linux, Apache, MySQL, and PHP. Let’s install the individual components:
The Web Server:
sudo apt install apache2After installation, we start the web server and ensure it launches automatically at system boot:
sudo systemctl start apache2
sudo systemctl enable apache2
The Database:
sudo apt install mysql-serverBefore setting up the database, let's apply some security settings:
sudo mysql_secure_installationHere, a new root password is set, remote access to the database should be disabled, and the test database should be deleted:
Disallow root login remotely? (Press y|Y for Yes, any other key for No) : Y
Remove test database and access to it? (Press y|Y for Yes, any other key for No) : Y
Reload privilege tables now? (Press y|Y for Yes, any other key for No) : Y
PHP Extensions:
sudo apt install php libapache2-mod-php php-mysql php-curl php-gd php-mbstring php-xml php-xmlrpc php-soap php-intl php-zip -yTo test your PHP installation, you can create a phpinfo.php file:
echo "<?php phpinfo(); ?>" | sudo tee /var/www/html/phpinfo.phpBy accessing the file via your local IP and filename (http://xxx.xxx.x.x/phpinfo.php), a window with information about your current PHP installation will appear in your browser. The file is located at /var/www/html/phpinfo.php and should be deleted immediately for security reasons.
rm /var/www/html/phpinfo.php
3. Creating a Database
Now we log into the database as the root user:
sudo mysql -u root -pSet up the database here:
CREATE DATABASE wordpressdatabase;
CREATE USER 'wordpressusername'@'localhost' IDENTIFIED BY 'a_strong_password';
GRANT ALL PRIVILEGES ON wordpressdatabase.* TO 'wordpressusername'@'localhost';
FLUSH PRIVILEGES;
EXIT;
Please replace the username (wordpressusername), the database name (wordpressdatabase), and the password (a_strong_password).
4. Download and Configuration of WordPress
Using the following commands, we move to the WordPress installation directory, download the compressed file, extract it, and assign the necessary permissions to the folders:
cd /var/www/html
wget https://wordpress.org/latest.tar.gz
tar xzvf latest.tar.gz
sudo chown -R www-data:www-data /var/www/html/wordpress
sudo chmod -R 755 /var/www/html/wordpress
Delete the compressed file using the following command, as it is no longer needed:
rm latest.tar.gzNow we create a WordPress configuration file by renaming the wp-config-sample.php file to wp-config.php:
sudo cp /var/www/html/wordpress/wp-config-sample.php /var/www/html/wordpress/wp-config.phpNext, we enter the database credentials into the wp-config.php file by opening it with this command:
sudo nano /var/www/html/wordpress/wp-config.phpdefine('DB_NAME', 'wordpressdatabase');
define('DB_USER', 'wordpressusername');
define('DB_PASSWORD', 'a_strong_password');
define('DB_HOST', 'localhost');Now comes the point why I created this tutorial in the first place and why I reinstalled WordPress several times while troubleshooting.
Scroll down in the wp-config.php file and insert the following command between
/* Add any custom values between this line and the "stop editing" line. */and
/* That's all, stop editing! Happy publishing. *//*
Handle SSL reverse proxy
*/
if ($_SERVER['HTTP_X_FORWARDED_PROTO'] == 'https')
$_SERVER['HTTPS']='on';
if (isset($_SERVER['HTTP_X_FORWARDED_HOST'])) {
$_SERVER['HTTP_HOST'] = $_SERVER['HTTP_X_FORWARDED_HOST'];
}It should look like this:
/* Add any custom values between this line and the "stop editing" line. */
/*
Handle SSL reverse proxy
*/
if ($_SERVER['HTTP_X_FORWARDED_PROTO'] == 'https')
    $_SERVER['HTTPS']='on';
if (isset($_SERVER['HTTP_X_FORWARDED_HOST'])) {
    $_SERVER['HTTP_HOST'] = $_SERVER['HTTP_X_FORWARDED_HOST'];
}
/* That's all, stop editing! Happy publishing. */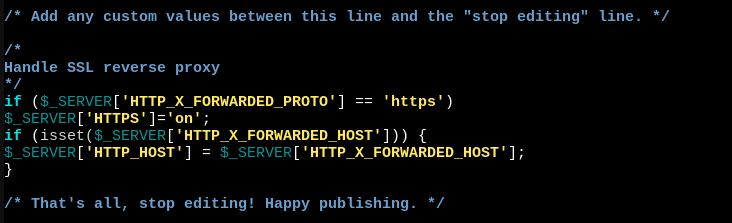
Now save the wp-config.php file with Ctrl+O and close it with Ctrl+X.
With this configuration, WordPress can now translate internal requests from NGINX from HTTP to HTTPS, ensuring the page is displayed correctly, as the default .htaccess file provided by WordPress does not handle this.
5. Apache Server Configuration
Now we configure the Apache server so that visitors are redirected to the correct folder:
sudo nano /etc/apache2/sites-available/wordpress.confPaste and adapt the following code here:
<VirtualHost *:80>
    ServerAdmin This email address is being protected from spambots. You need JavaScript enabled to view it.
    ServerName yourdomain.com
    ServerAlias www.yourdomain.com
    DocumentRoot /var/www/html/wordpress
    ErrorLog ${APACHE_LOG_DIR}/error.log
    CustomLog ${APACHE_LOG_DIR}/access.log combined
    <Directory /var/www/html/wordpress/>
        AllowOverride All
    </Directory>
</VirtualHost>
Save again with Ctrl+O and exit with Ctrl+X.
Now activate the wordpress.conf file and deactivate the 000-default.conf file:
sudo a2ensite wordpress.conf
sudo a2dissite 000-default.conf
Now activate the rewrite module and restart the Apache server:
sudo a2enmod rewrite
sudo systemctl restart apache2
It is best to access your site via your domain. This should already be set up and have a Let's Encrypt certificate. Now, follow the installation wizard.
Adjusting PHP Settings
By default, PHP is configured to allow file uploads of only 2 megabytes via the browser. While 2 MB is sufficient for image files, it quickly becomes inadequate if you want to provide audio files, videos, or PDFs.
To change this, open the php.ini:
nano /etc/php/8.3/apache2/php.iniYour PHP version may differ from mine. Instead of 8.3, it might be a newer version. You can check your version in the phpinfo.php file created earlier, or navigate to the folder via cd /etc/php. Entering ls will display your installed PHP version.
Change post_max_size from:
post_max_size = 2Mto, for example:
post_max_size = 128MFinding the specific line can be tedious as it is located quite far down. The search function in the browser shell is often useless. However, since it makes little sense to set up SSH and configure the firewall just for this one change, it is advisable to take the two minutes to find it manually.
Helpful Resources
Every newcomer to WordPress is initially overwhelmed by the menu, as is the case with any other CMS. The site webseitenmachen.de was very helpful to me. The tutorials are excellent and explained very clearly. It’s a well-invested half hour to quickly achieve useful results.